Thursday, December 29, 2011

Everything AND the bathroom Sink!

It has been awhile since I posted.  It has been a busy week or two.  I had a wonderful Christmas, and I am looking forward to this weekend.  My son is coming in from Hawaii to to visit for about a week.  He is a submariner in the Navy, and I am really looking forward to his visit. It has been a YEAR since I have wrapped my arms around that boy! But, that means I am going to be busy for another week, so I thought I better get this post off. I took some pictures of a mosaic counter top that I did a while back. My salon had the ugliest bathroom counter in Southern Indiana, I am sure.   As always, the budget is tight, so I thought I would make one.  The glass I used is called Van Gough Glass.  It comes in a variety of colors. This particular glass was copper, green, and brown.  The back of the glass is black so it is opaque and is mostly used for mosaics, but perhaps you could use it in stained glass projects too.  An epoxy product was poured over the top of it so that it would be smooth. My biggest fan did all the plumbing, that is just not my bag. He did an excellent job with the placement of the faucet and drain holes, which, by the way, were drilled in the board before the mosaic was laid.  The water hit the bowl perfectly!

Close up of Mosaic (pretty random placement)
Hope you like it, Thanks for Looking!! Happy New Year!  It's gonna' be a good one, I can just tell!!

Thanks For Looking,  Kathy

Your Comments make me smile ;)


Partying at:


Saturday, December 17, 2011

The Cross-Dressing Man's Valet Chair

I bought this chair at the Indiana Realty Auction a few weeks ago.  I saw it and I just had to have it.  I had never seen a chair like this, and I thought it was really cool.  I ended up in a bidding war with my friend Shelley, I knew she kinda wanted it, but I didn't know she was the one bidding against me!  I ended up paying way more for it than I thought I would have to, but I think it turned out really pretty.  After I bought it, and upon further inspection, I realized that it was an old Man's Valet Chair, but that is not what I had PLANNED for it! I thought it would make a really awesome Vanity Chair. I spent a whole Sunday working on it.  It didn't really need any repair work, but I had to spray paint all the fixtures and the legs.  It smelled a little musty too, so I had to clean the dingle berries off, air it out, and fabreeze it really well. It is all good now, I assure you. :) The fabric I used to Upholster it with  was from a duvet cover that I bought at a consignment store for $20.  I have used the heck out of that fabric.  I have covered 3 large pillows for by bedroom, and another little ottoman, so it was well worth the 20 bucks I spent on it.What do you think Man's Valet Chair vs. Vanity Chair?
Beautiful Brown Naugahyde Upholstery
Man's Valet Chair

Finished Vanity Chair
From Behind
A closer Look of his her behind
I even upholstered the inside! A secret compartment!

I don't know about you, but I like this chair better in DRAG!
Thanks for looking!!!

Thursday, December 15, 2011

Mike's Bar and the Painted Lady

It has been another busy day. I finishing up some projects I have been working on for Christmas Presents for family and friends, so I am going to share some photos of MIKE'S BAR.  This is a project "My Biggest Fan" and I worked on a few years ago.  We also had some help from my youngest son Ethan when he was in his last year of high school. Ethan helped cut and place the glass pieces and grout the design. I believe most, if not all of the other family members donated items to this project, including, beer tops, wedding rings (bad decisions), VW memorabilia, jewelry, Swedish Kronar,  wine corks, wine bottles, and let us not forget the coon prick that graces the inside of  the insert on the right side of the bar.  The left insert is  a design of ammunition and various shells, and a dedication to my two sons that are in the service, one a United States Marine and the other a Submariner in the U.S. Navy.  The main Structure of the Bar was built by "My Biggest Fan" using mostly recycled material.  The Tongue and groove paneling and the foot rail came out of the burnt out building that used to house the Lake Rudolph Camp Ground Office.  The Bar Rail was from some unused milled work from a friends of ours.  The Benches were made from the sides of an old water bed, (see there was a use for those things).  The new additions this summer were the fancily painted porch posts on each end of the bar, and the "flying lady" masterfully positioned by "my biggest fan", and painted by ME!  I have 3 or 4 more of those old mannequins, she may have some company soon!  There was one more recent addition to the bar area, but I did not get a picture of it before I BROKE my camera, is what "my biggest fan" likes to call his Tequila Swing.  I will just let you imagine what that is until I get a picture of it with my new camera, I am going to have to shop for tomorrow.  :) The Camera accident:  I set the camera, that was attached to the a tripod, away from the bar. I was getting ready to take a picture of "my biggest fan", and one of the legs of the tripod wasn't pulled out as far as the other legs, when I let go,  wham!  The tripod fell over with the camera lens facing the concrete.  So now the lens is bent in the "out" position, and the camera will not turn off or on properly.  The good news is that I was able to download the pictures I had just taken. I swear I had not sampled anything from the bar before this happened!  So here it is: MIKE'S BAR

Can anyone figure out what the things on the ends of the benches are?  For those of you that have been to Mike's Bar don't tweet it.
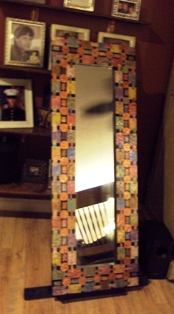
Glass Mosaic Bar Top
The glass was grouted, then liquid acrylic was poured over the entire bar
Hmmm?

Porch Post - I think we used every left over can of spray paint we had, It took us a whole Sunday Afternoon
to paint this, but it was worth it don't you think?
The "Flying  Lady"~ I like to think of her as "the colorful twists and turns of a woman". She will be joined soon by 3 or 4 more ladies that need to have some clothes (or paint) on before they will show themselves off! 
There has been a lot of fun had by our family and friends in this bar, so the project was well worth the time and effort.

Pictures of the Tequila Swing to be added later and I guess the identity of "my biggest fan" will remain a mystery for a little while longer. Thanks for looking!


Monday, December 12, 2011

My very first Mosaic Mirror

Since I had a really busy day at my Beauty Salon today, I thought that I would just share a picture of the very first Mirror that I decorated.  I have had this mirror for several years and the design that was on the frame was quite out of date.  I was just getting into fused glass and stained glass and had lots of scraps laying around, so this is what I did with them.
This was my very first Mosaic Mirror.  I used strips of fire glazed stained glass, Van Gough Glass, and fused
dichroic glass.  I had so many complements on this from my family and friends, now you can't stop me.
 It is so hard to take a picture of a mirror!  There is always a reflection of something, just as long as it isn't me I guess! I tried to smear the reflection in the first photo, but that took forEVER, so you will just have to look at my large clock in this one.  I gave up!  Thanks for looking!

Sunday, December 11, 2011

$2.00 Yard Sale Chair


This is a chair I bought at a yard sale a few weeks ago for $2.00!  The lady told me that it was left in a storage unit that they own.  Why would anyone leave this chair behind? I think it would have gone great in my mom's 1970's kitchen with the large yellow, green, and orange daisy's - can you picture it? Ewwwww, I can!

But Look At Her NOW!

Look at her beautiful Detail 
 I think I made that Pillow too - a match made in heaven!

I just love her, but I can't keep her, she will have to go up for sale. :(


Materials Used:  Off White Chalk Paint with a dark brown glaze
Methods used:  Slight distressing with hand sander
Finish:  Paste Wax
Seat:  Recovered with Burlap

Thanks for looking,  Kathy

Your comments make me ;)


Partying here:

lank">

Saturday, December 10, 2011

I need some joiners

Ok, friends, I see I am getting some hits on this blog, but I need some joiners, please, it is easy, just click the join button and follow the instructions, add a picture so I can see who you are.

Thursday, December 8, 2011

The Trash Picked Trunk

One day "my biggest fan" was driving home from work and while passing my neighbor's house at the bottom of our hill he spied an old trunk sitting by their trash.  Well he knows me too well so he reported this to me upon walking in the door.  I had never seen anything good down there before, so I told him that I would have to look at it my self.  Next morning on my way to work I saw it, and immediately called him and told him if it was still there when he came home from work to "go get it".  Being the kind of person that he is, he stopped and thought that he would let the neighbors know that he was going to take it off their hands,  if it was ok.  Long story, but he loaded it in his truck and brought it home.  When I first saw it, I thought Oh My Goodness, what the heck am I going to do with this!  It was is really bad shape, but it had this really awesome embossed tin detail, it was rusted in places, and the tin was all torn and rough on the edges. Someone, I assume the last owners, "the neighbors" had put this...well, I think it was some type of a buffing pad on one corner of the bottom of it. It was attached with the biggest nail you have ever seen!   I am sure it was a quick fix to prop it up, as it was missing a piece on the bottom. "Hey honey go get that buffing pad off of your car buffer thingy so I can prop up this trunk". The inside was covered in the  most unbelievable blue swirly (with a white background) sticky contact paper!  Fortunately for me, the contact paper had been on there so long that  it had lost a lot of its "sticky"!  It sat in my garage for the last year. Every time I got in my car I would just looking at it thinking... that is a lot of work.  Recently I got up my ambition  and loaded  it onto my work table and started pulling off the "unsticky" contact paper. Underneath the unsticky contact paper was the original paper lining that was flaking off at an alarming rate!  You could blow on it and it would come off!  Now  this is were I get really mad at my self!  I took a before picture, and then later realized I DELETED it by mistake! I had a great picture of that buffing pad too.... darn it!  But I did get some shots of it while it was getting worked on.  The tin on the edge of the trunck was really rough and torn and, well frankly it was dangerous, so "my biggest fan" and I had to do some repair work on it.  I got to use contact cement for the first time!!!! That was fun, oh and lots and lots of clamps.  Do you think it is over kill on the clamps? 


From these pictures you can see the rust spots.   I forgot to mention that the last owners or someone really "with it" in the 70's antiqued it, bless their hearts!  We also added some feet to it, because you know it had that piece missing on the bottom.  That  leveled it up and will keep it from scratching the floor. I was thinking about keeping the buffing pad on it, but I lost that really big nail.   So below is the finished product.


 The Embossed Detail


The Inside - Lined with Burlap 


 I used a dark Brown Paint and dry brushed over the embossed detail with a copper metallic and used a rub on varnish over all.  What do you think?


Wednesday, December 7, 2011

Feather Rings

Here are some rings I made for the holidays!  Great for parties and New Years Eve!

Monday, November 28, 2011